Forward
Hello everyone, this images was originally created for a competition and I thought I'd show the process I used.
You can see the progress of the design from start to finish, with various comments and the thoughts I had along the way.
There was limited time available before the competition deadline.
I hope you enjoy the insight to this project.
|
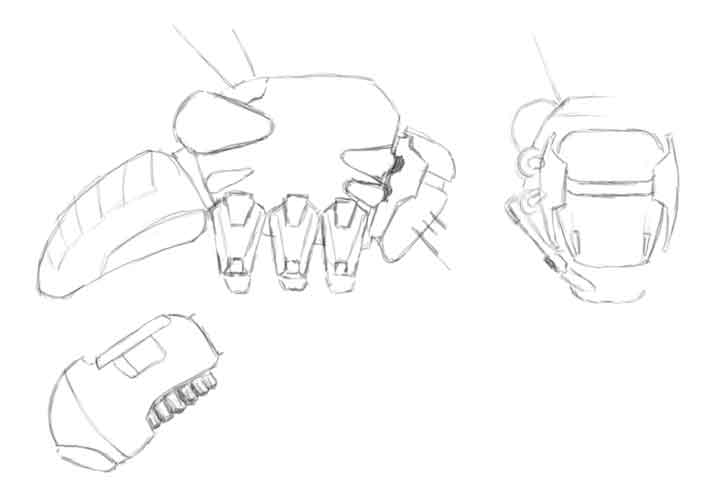
Step 1: Concept drawing Rather than the usual fair of a ship bristlling with guns, I've gone for a more leisurely paced craft; a lumbering cargo carrier. Inspiration: well, I think most of you will notice the slight resemblance to a bee, but I also find Shirows work captivating and so I'm sure I draw some inspiration from his drawings in Appleseed |
| |||
|
Step 2: Roughing out I'm only roughing out the shape of the ship at the moment, seeing what works and what doesn't. This may force changes from the original concept art. My first major deviation is the legs, I prefer the continued insect reference rather than 6 legs of identical size and alignment |
| |||
|
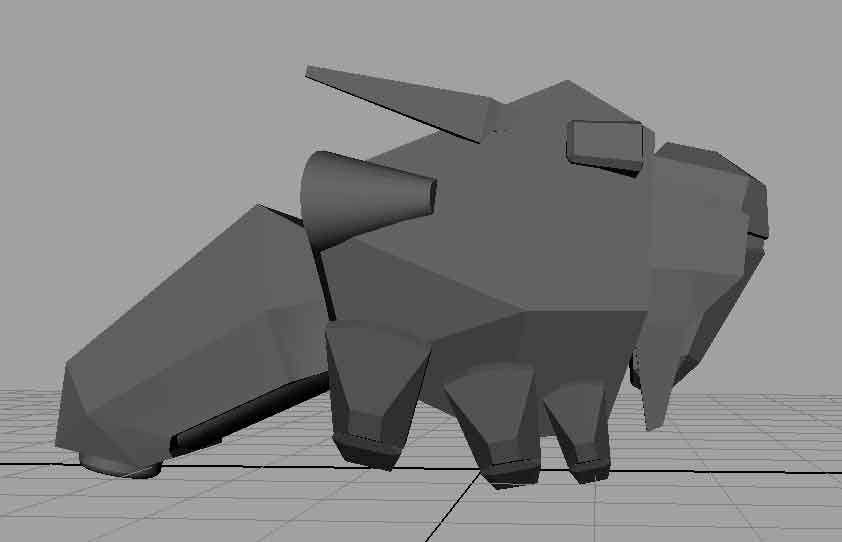
Step 3: Start the modeling I'm using polygons so far, with some subdivision surfaces on the legs, but I might simplify the legs later to keep them in style with the rest of the ship. The detailing has yet to be finished as I want to be happy with the basic shape first. To get to this point has probably taken about 10 hours, changing the design and trying different ideas out. I wish I'd completed my concept drawings now My approach to modelling is not just to slap some polygons together but rather to make the item looked like it has been assembled, to make the construction of the item believable. You don't have to see the rivets, I just like to anchor the viewer in reality (even if the subject is fiction). |
| |||
|
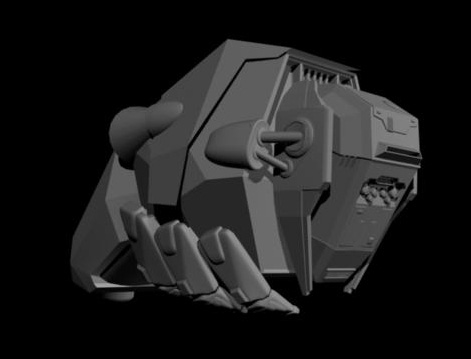
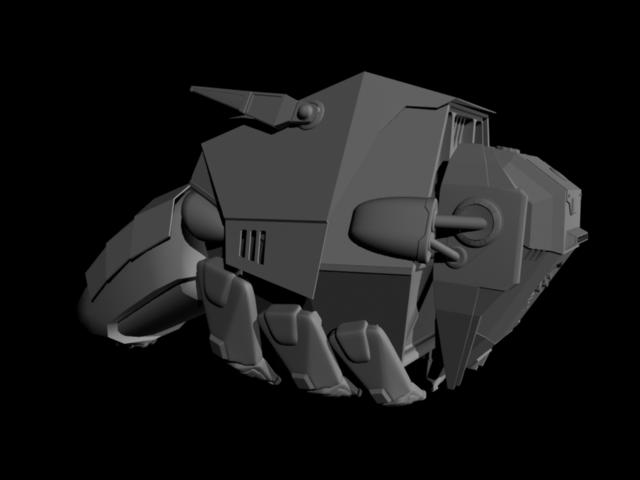
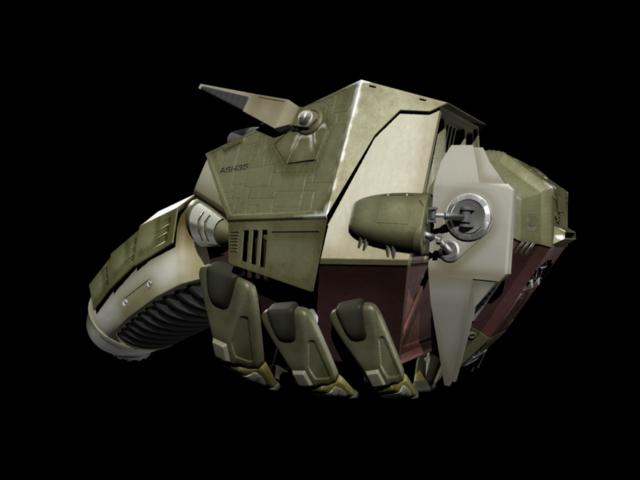
Step 4: Refining the model The basic model is now complete, I have some more detailing to do to help with the scale. I might make some more tweaks to the model as that progresses. The dealine is fast approaching and I haven't even started texturing yet! I guess my definition for 'lumbering' is slow, with the small engines on the back (just out of view) it means this ship isn't going to get up to speed quickley. |
| |||
|
Step 5: Start the texturing Basic texturing started, I've created the UV's for a couple of parts and setup the shaders to use colour, specular, bump and diffuse maps. The view shows the start of texturing. All the maps need more work, I just wanted to setup the UV's mostly and get a feel for my planned colour scheme (to see if it works) I have some scale issues to resolve. In my mind the scale of this was to be a bit larger than AT-AT (space for 4 or 5 'people' in the top section of the head), so I guess this is turning out to be less of a cargo ship and more of a freight carrier, maybe hauling freight from the main cargo carrier to a dock? Or should I put UPS on the side ;) I was thinking of making the tail detach to allow different cargo pods to be picked up quickly - but now we are into the realms of fantasy, I'm never going to have the time for that. |
| |||||||||

|
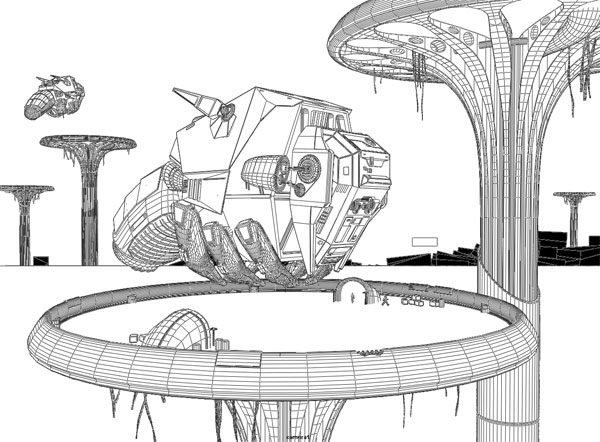
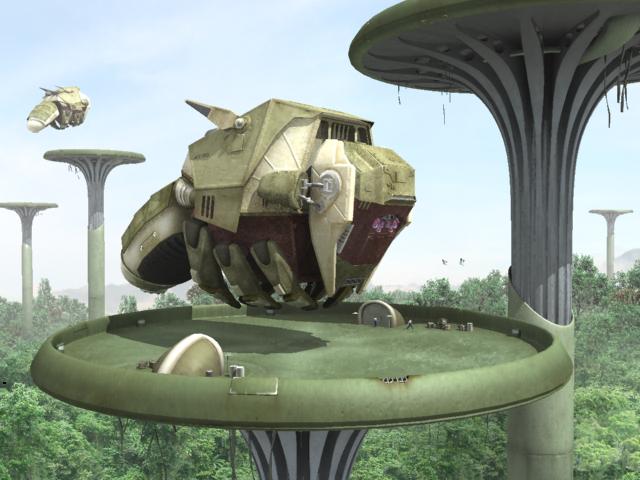
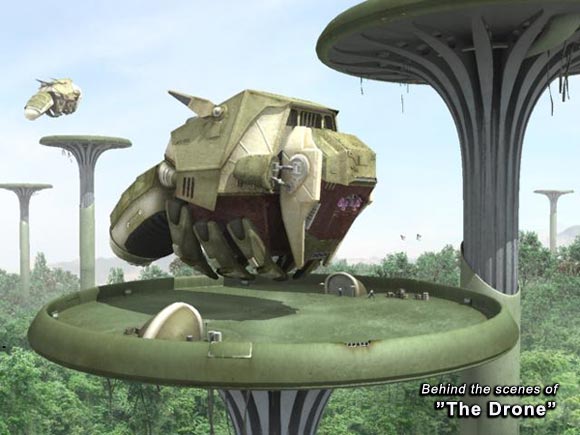
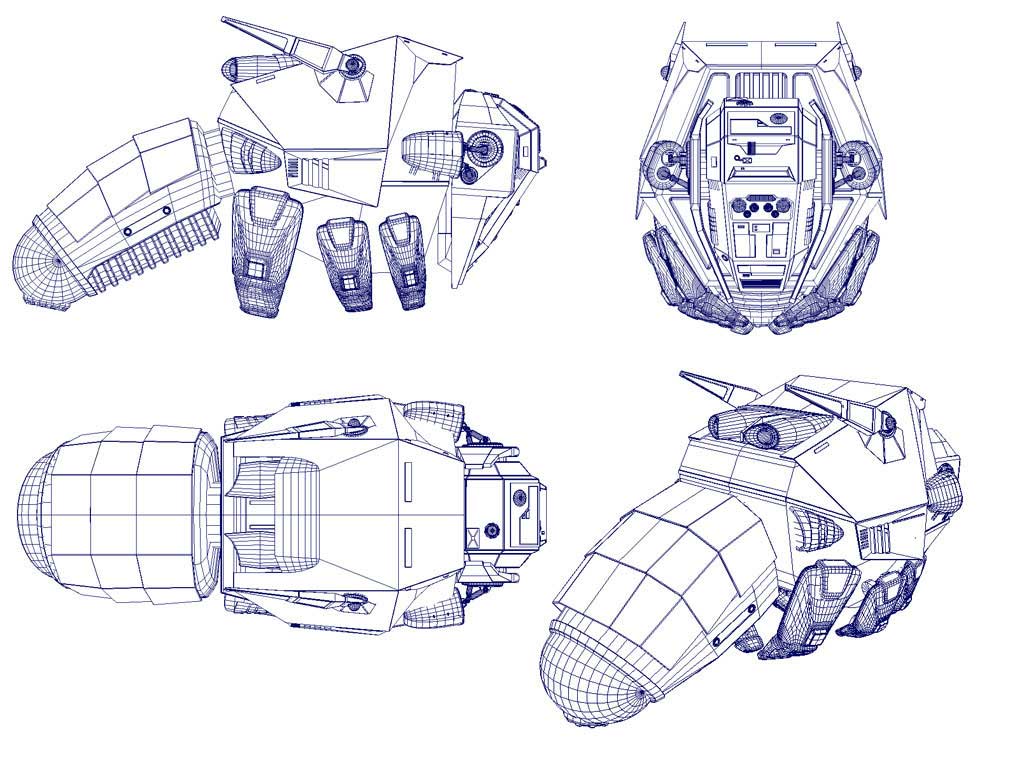
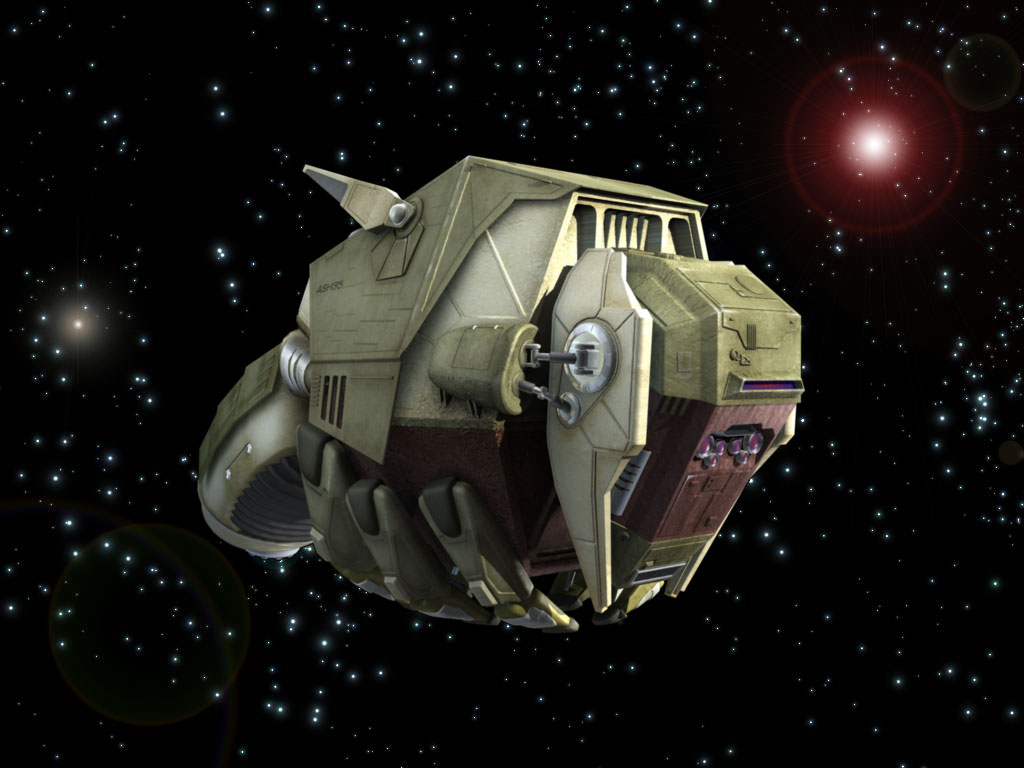
Step 6: Finished model with texturing I tend to show the one angle because thats the view I use in the final render. Working with that view allows me to determine what to work on, where the detail should go. It also allows me to start setting up the lighting during test renders. Some plating is modelled, some is bump mapped. I added a wireframe view so you can see whats what (and the rapid modelling technique - I had to cut corners somewhere just to finish on time) I never had time to finish the specular to my liking (amongst other things), so here is the completed Insect Ship is a very quick space scene (a quick paint effect star field) |
| |||||||||

|
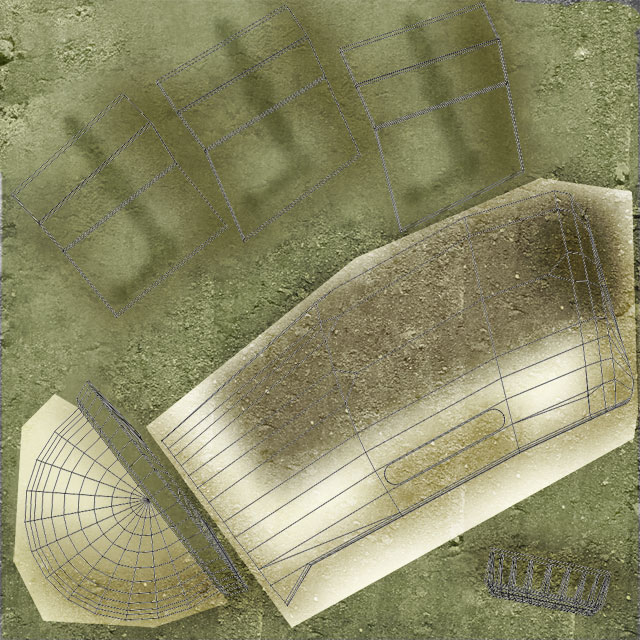
Step 7: Concept for the scene... Modelling the scene to set the ship in, the concept is a giant lilley pad. |
| |||
|
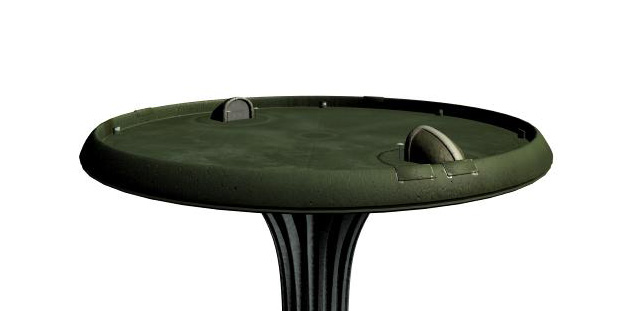
Step 8: Some more texturing The asic shape of the landing pad seems complete, so time to start the texturing with a colour, diffuse, bump and specular map. This is a simple render, only one directional light source. My only concern is that the colour may prove to similar to the ship to make the scene interesting. I guess only time will tell. Next its time to start on the rest of the scene: the background and lighting. Then I can tweak the textures some more |
| ||||||

|
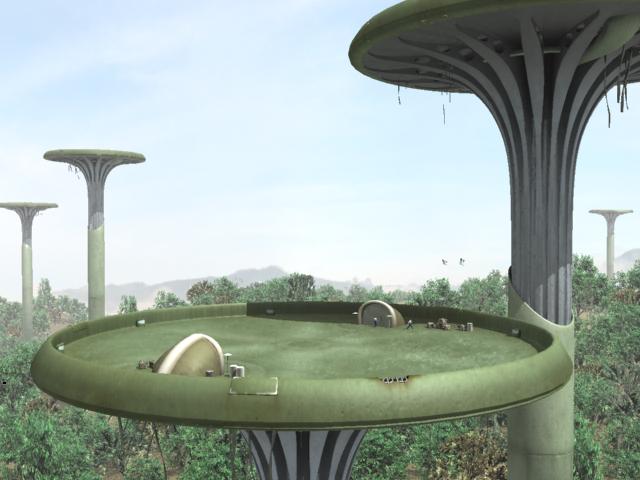
Step 9: Setting the scene The sand colour is only for my reference, its actually going to be a forest. I like the the way the sky end environment fog have come out, simple and fast. The other landing pads in the scene are just placeholders while I try different ideas out - I want a fast test render so I'm keeping the scene simple |
| |||

|
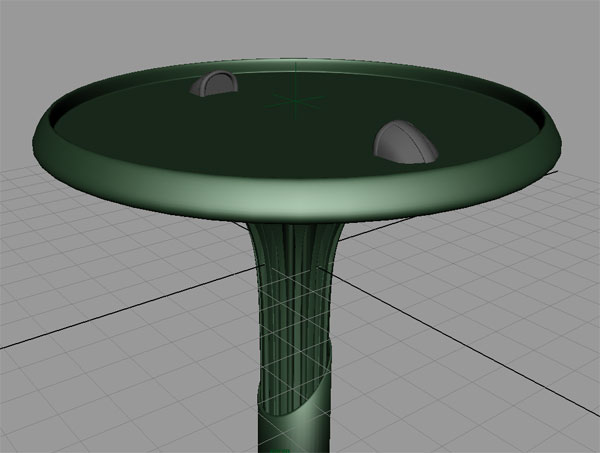
Step 10: Refining the scene How to get the goods or people off this pad? That thought had struck me (but I ignored it for a while). I think what happens is that there is an elevator in the stem that rises through the center of the pad, so large cargo can only be carried away when the ship has left the pad. The small 'shells' are for passengers to access the elevator below the landing pad, so I think its covered. The scene has been fleshed out some more, and trees have been added. I'm not happy with them at all. Anyone got any tips for forests in Maya - the paint effects I used don't seem that convincing to me. The rust stain on the landing pad rim is in prep for a rust hole, I just haven't done it yet since I've been trying to get the darn trees right. Got some more filler to add too (cargo crates and stuff) |
| |||

|
Step 11: Adding the ship back in This shot has some extra furniture on the landing pad to add to sense of scale. I changed the trees so I could see more branches but the result was not as good as I hoped, so I blended in an image in for the final pic. I've included the ships in the scene and a wireframe for those of you who like to view that sort of thing. |
| |||||||||||